
Installed New CPU No Display – Get Your Display Back
After installing a new CPU, you might encounter the frustrating problem of no display on your monitor. While this problem can be frightful, it’s important to remain calm and carefully troubleshoot the issue to identify and resolve the underlying cause.
To resolve a CPU no-display issue after installation, ensure proper connections, reseat components, force restart, CMOS battery reset, update BIOS if necessary, and check peripherals.
This article will guide you through the steps to diagnose and fix the “no display” problem after installing a new CPU.
How To Fix CPU No Display After Installing?
Numerous factors can cause a blank screen after a CPU upgrade. Confirm motherboard and CPU compatibility via the manufacturer’s resources to address this issue.
1. Initial Checks:
Before diving into the troubleshooting process, it’s essential to perform some initial checks to rule out simple causes of the problem.
- Check Power and Connections: Ensure that your computer is receiving power and that all cables, including the power cable, monitor cable, and any additional peripheral connections, are secure.
- Monitor Status: Verify that your monitor is functioning correctly. Test it with another device to confirm that the monitor is not the issue.
- CPU Compatibility: Make sure your new CPU is compatible with your motherboard. Consult your motherboard’s documentation or the manufacturer’s website to confirm compatibility.
2. Reseating Components:
Sometimes, improper seating of hardware components can lead to display problems. Follow these steps to reseat critical components:
- RAM: Turn off your computer, unplug it, and then reseat the RAM sticks. Make sure they are securely locked into their slots.
- GPU (Graphics Card): If you have a dedicated graphics card, reseat it in its PCIe slot. Ensure that any power connectors to the GPU are correctly attached.
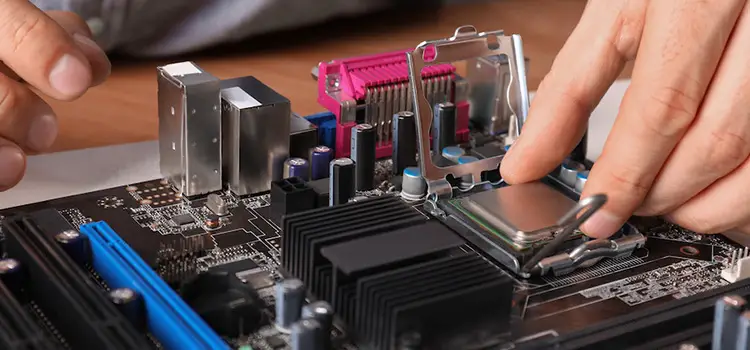
- CPU: While reseating the CPU itself is not recommended unless necessary, ensure that the CPU cooler and fan are correctly installed. Overheating due to an incorrectly seated cooler can cause display issues.
3. Force Restart Your PC:
If the screen is still black, try forcing a restart by pressing and holding the power button for 10 seconds three times in a row. This should bring up the Windows startup repair menu. If the restart does not fix your problem, skip this step and move on to the next one.
4. BIOS/UEFI Update:
In many cases, a new CPU may require a BIOS/UEFI update to be recognized and function correctly with your motherboard. Follow these steps:

- First, ensure a USB flash drive with sufficient storage (at least 8GB) is available.
- Download the BIOS update file for your Alienware R1 Aurora from the Dell support website.
- Transfer the BIOS update file to the empty USB flash drive.
- Safely eject the flash drive from your external drive if necessary.
- Insert the USB flash drive into a USB port on your Alienware computer.
- Power on the computer and immediately press the key specified to access the BIOS or boot menu (typically F2 or F12).
- From the BIOS or boot menu, select the option to update the BIOS using the file on the USB flash drive.
- After the update is successful, remove the USB flash drive and restart your computer.
5. CMOS Battery Reset:
Resetting the CMOS (Complementary Metal-Oxide-Semiconductor) settings can sometimes resolve display issues. Follow these steps:
- Turn off your computer and disconnect it from power.
- Locate the CMOS battery on your motherboard. It is usually a small coin-cell battery.
- Remove the CMOS battery from its socket carefully.
- Wait 5 to 10 minutes to ensure all residual power is drained from the motherboard.
- Reinsert the CMOS battery into its socket.
- Power on your computer and check if the display issue is resolved.
6. Loading Into Windows:
If your computer gets stuck while loading into Windows after a BIOS update or hardware changes, it could be due to conflicting settings or drivers.
- Boot your computer in Safe Mode by repeatedly pressing the F8 key during startup until you see the Advanced Boot Options menu.
- In Safe Mode, Windows will load with minimal drivers and settings, which can help resolve issues.
- Once in Safe Mode, you can uninstall any recently installed drivers or software causing the problem.
- After making the necessary changes, restart your computer to see if it boots into Windows normally.
7. Check Peripherals:
Sometimes, peripheral devices can cause display problems. Follow these steps to check:
- Disconnect all peripherals (keyboard, mouse, external drives, etc.) except for the monitor.
- Boot your computer and see if the display issue persists. If the display works correctly, reconnect each peripheral individually to identify the faulty device.
8. Inspect for Physical Damage:
Examine your motherboard for any physical damage, such as bent pins, damaged capacitors, or burnt areas. If you find any damage, it may be necessary to replace the affected component.
9. Monitor GPU and Drivers:
If you have both integrated graphics (on the motherboard) and a dedicated GPU, ensure the monitor is connected to the correct output. Sometimes, the display may be directed to the integrated graphics. Additionally, ensure that you have the latest GPU drivers installed.
Why Is My CPU Working But No Display?
The issue of a working CPU with no display can stem from various factors. These include simple causes like loose or defective connections or incorrect source inputs. Additionally, reseating essential CPU components such as the RAM and GPU can resolve this problem.

In cases where the components have been improperly installed, this can contribute to the issue. Furthermore, more complex internal hardware problems may lead to a lack of display. In such instances, seeking assistance from technology experts might be necessary to diagnose and address the underlying issues effectively.
How Do I Get My Computer To Recognize My New CPU?
Getting your computer to recognize a new CPU, even when the upgrade isn’t significant, can sometimes pose a challenge. However, it’s not a major issue, and you can follow these steps to ensure proper recognition:
- Access Device Manager: Select the search button, enter “Device Manager,” and click OK.
- Expand Processors: Expand the ‘Processors’ section in the Device Manager window. Here, you will see all the processor cores listed.
- Uninstall Cores: Use the context menu when right-click on each processing cores and choose “Uninstall.” Make sure to remove each core separately.
- Decline Restart: A window may appear after uninstalling each core, requesting permission to restart your computer. Refuse this request, and then remove all the CPU cores.
- Restart Your PC: After removing all the cores, restart your computer.
- Automatic Driver Repopulation: Upon reboot, your computer will not immediately recognize the new CPU because you reset the processor configuration. However, the computer will start repopulating the necessary drivers in your Device Manager.
- Check Processor Section: After completing this process, you can check the ‘Processor’ section in your Device Manager. You will find that the processor cores have been reinstalled, and your computer should now recognize the new CPU correctly.
This method effectively prompts your computer to reconfigure and adapt to the new CPU, ensuring it functions seamlessly with the upgraded hardware.
Frequently Asked Questions:
1. Is It Necessary To Reset My PC After Installing A New CPU?
When upgrading to a new CPU, your computer should recognize it automatically. However, in reality, this seamless recognition only sometimes occurs. You should take certain steps to ensure your computer correctly acknowledges the newly installed CPU.
2. Can A CPU Lead To A “No Signal” Issue?
In cases where your CPU operates smoothly without any apparent problems but your monitor displays a “No Signal” message, several hardware components could contribute to this issue. Potential culprits include problems with your RAM, CMOS battery, graphics card, or faulty cable connections.
3. Does Changing The CPU Affect Windows 10?
If you make significant alterations to your computer, such as replacing the motherboard, CPU, or primary storage drive, Windows 10 may not automatically recognize the new system configuration. In such instances, you might need to reinstall certain programs previously installed on your desktop.
4. Can I Swap Out The CPU?
Yes, you can replace the CPU, provided the motherboard and CPU cooler are compatible with the new processor. Additionally, upgrading other components may be required to ensure compatibility between the CPU and the rest of the PC.
Conclusion:
It can be upsetting to experience a “No Display” problem after installing a new CPU, but most issues can be fixed with careful investigation.
This thorough guide’s detailed instructions will help you locate and fix the problem’s underlying causes so you can fully benefit from your increased CPU’s improved performance without experiencing display-related hiccups.
While some issues can be resolved easily by reseating components or checking connections, others require more complex procedures like BIOS updates or consulting an expert.